Often overlooked is the important role bees play in our gardens and the planet in general. One of these very important insects is the mason bee.
What are Mason Bees?
Mason Bees are a species of bees in the genus Osmia, of the family Megachilidae. They are termed ‘Mason’ because of their tendency to use mud in the construction of their nests.
They are friendly, small-sized bees – half the size of a honey bee – and are proficient pollinators. Indeed, when it comes to their efficiency in pollination, mason bees are even more efficient than honey bees.
Due to their friendliness, mason bees are one of the easiest bee species to raise. The males don’t sting and the females only sting as a last resort.
Where can Mason Bees be found?
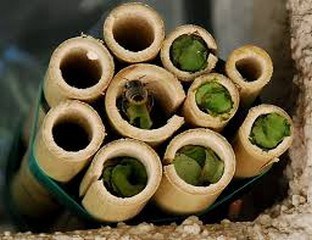
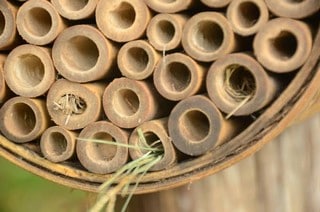
Unlike other species of bees, mason bees do not exist in colonies, rather living solitary lives in hives. They are mostly found nesting in readymade holes filled with mud, with the females boring tunnels in the holes to lay her eggs.
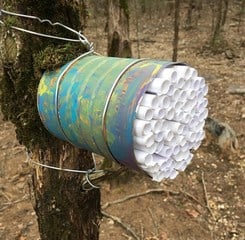
How to construct a DIY Mason Bee House
Making a mason bee house is quite a simple and fun project to undertake and it can be completed in a matter of minutes.
In this article, we’re going to walk you through a step-by-step process to create an inviting DIY mason bee house that these helpful insects will be eager to move into.
1. Collect materials for your bee house
It would be helpful to get these materials ready if you are to embark on a bee house construction project:
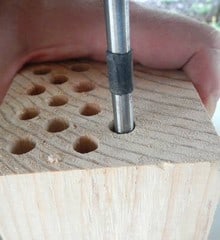
- Thick block of untreated wood – about 6 to 8-inches long
- Drill press
- A hand drill – corded or cordless
- 5/16-inch drill bit
- Hand saw
- Roof material – could be scrap wood or plastic
- Sandpaper
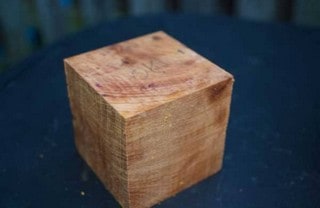

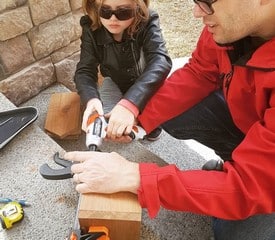
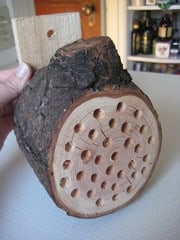
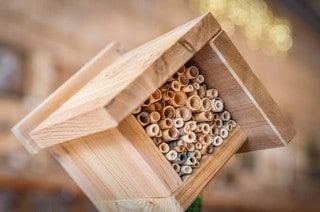
2. Making the bee house
After successfully gathering the materials, the next thing to do is create the nest.
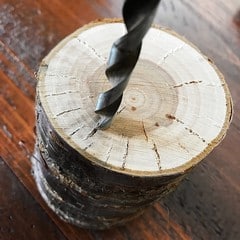
Using the drill press with the 5/16-inch drill bit attached, make holes at a depth of at least 6 inches in your block of wood. The drill press will assist you in making straight holes, hence making your work easier. If you don’t have one available, you can proceed to make holes with your hand drill, but you have to keep your hands extremely steady.
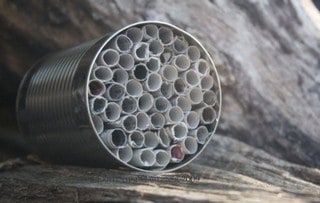
Make sure the holes are well spaced – you don’t need to follow a specific pattern. Also, do not put too much holes in one block so you don’t confuse the bees.
These holes will serve as the nesting tubes. Mason bees are comfortable nesting at a depth of around 6 inches. Also, making deep holes helps protect mason bee larvae from birds.
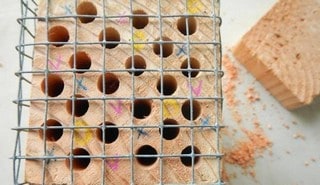
When you’re done drilling, clear over sawdust leftover in the holes by banging on the wood block. Use sandpaper to smoothen the edges of the freshly drilled holes so that the mason bees will find it easy to move in and out of the holes.
After doing all this, cover the face of the mason bee house with hardware cloth fitted with a staple gun. Ensure the hardware cloth protrudes slightly to prevent long-beaked birds from eating your precious mason bee larvae.


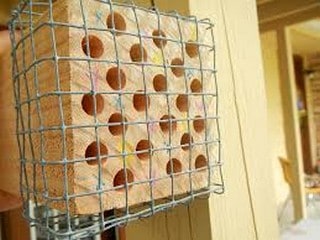
3. Hang up your DIY mason bee house
Hanging up the finished mason bee house is a technical, but ultimately easy process. Ensure you place the house strategically in a place well exposed to direct sunlight and shielded from the wind.
Keep the mason bee house at a height of between 3-5 feet off the ground. Also, place the house under some sort of roofing or cover that will facilitate water runoff whenever it is raining.
Make sure your mason bee house is firmly placed. Avoid hanging it up with threads or ropes, else you risk upsetting the bee eggs whenever there’s a strong wind.
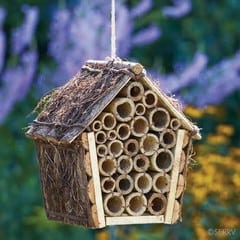
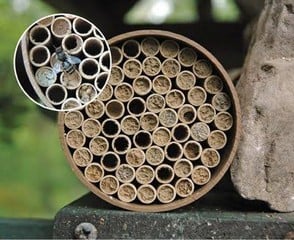
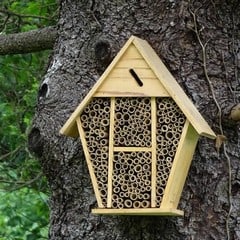
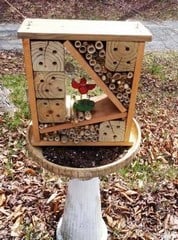
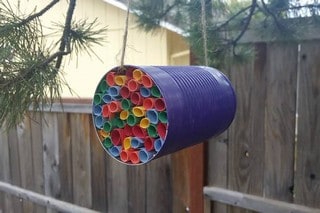
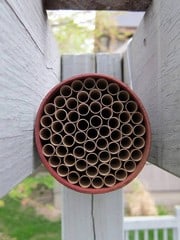
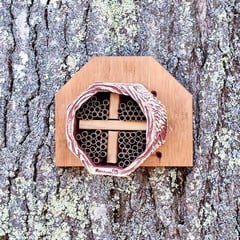
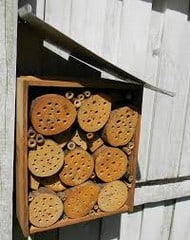
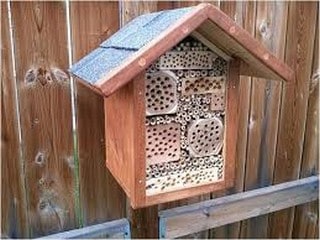
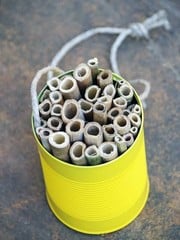
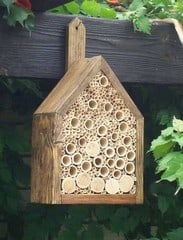
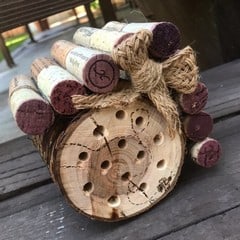
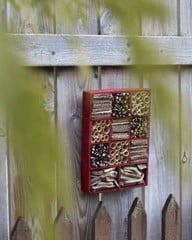
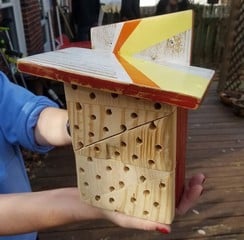
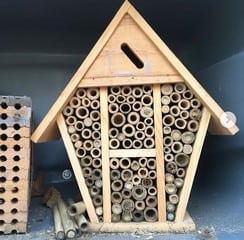
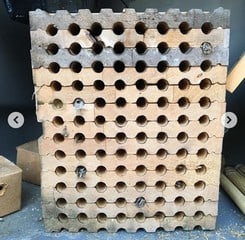
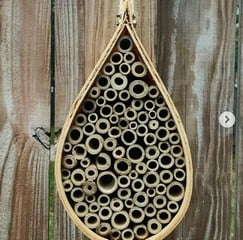
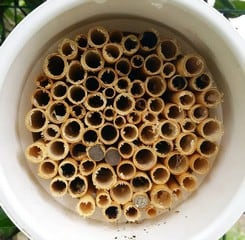
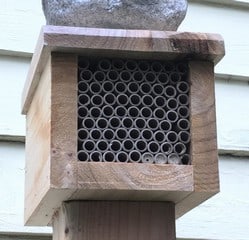
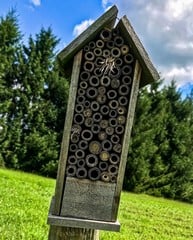
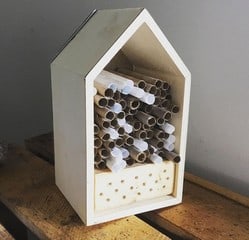
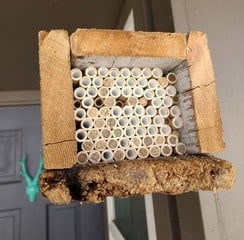
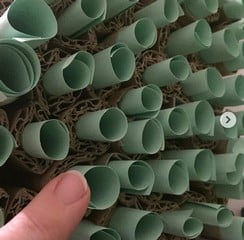
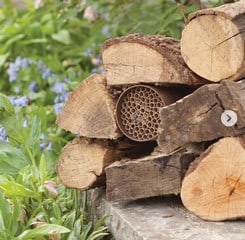
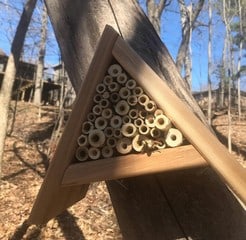
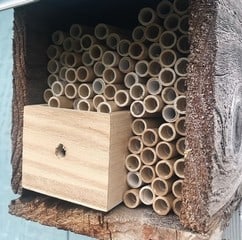
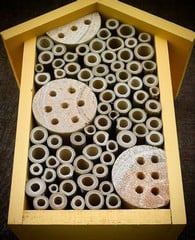
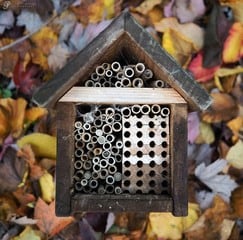
Checkout other awesome Mason bee house ideas below:


Check my other post on sustainable farming and DIY bee hives design.